- No products in the cart.
If you don't have photoshop, and maybe don't have a lot of editing knowledge, changing the text or color of a premade icon pack may be pretty daunting. Not all of our packs have versions where we can do the editing for you - so if you want that chest to be a different color, as in our Chest and Key Icon Pack (or any of our others), you'll have to do it yourself. Luckily, you don't have to fork out hundreds of dollars on an adobe subscription to be able to add your own text or change the colors - these things are easy to do, and almost any program can do it!
So, if you don't have Photoshop, the first thing you'll need is a program that allows for opening .PSD files or .PNG files. Most of our packs come in .PNG format, and almost any program will open those, so you are in luck. Here is a list of programs, free and paid, that I would recommend:
- Krita (Most likely your best option) *Free
- Gimp (You may already have this one, it has been around the longest) *Free
- Paint.net *Free
- Photopea (No download required) *Free
- Photoshop (Professional-grade) *Paid
For this guide, I'll be demonstrating in the program Krita - this is a free program available on both MacOS and Windows. It has many similar functions to Photoshop, and is a solid program for any of your editing needs- including changing or editing Minecraft Server Icons.
Step 1:
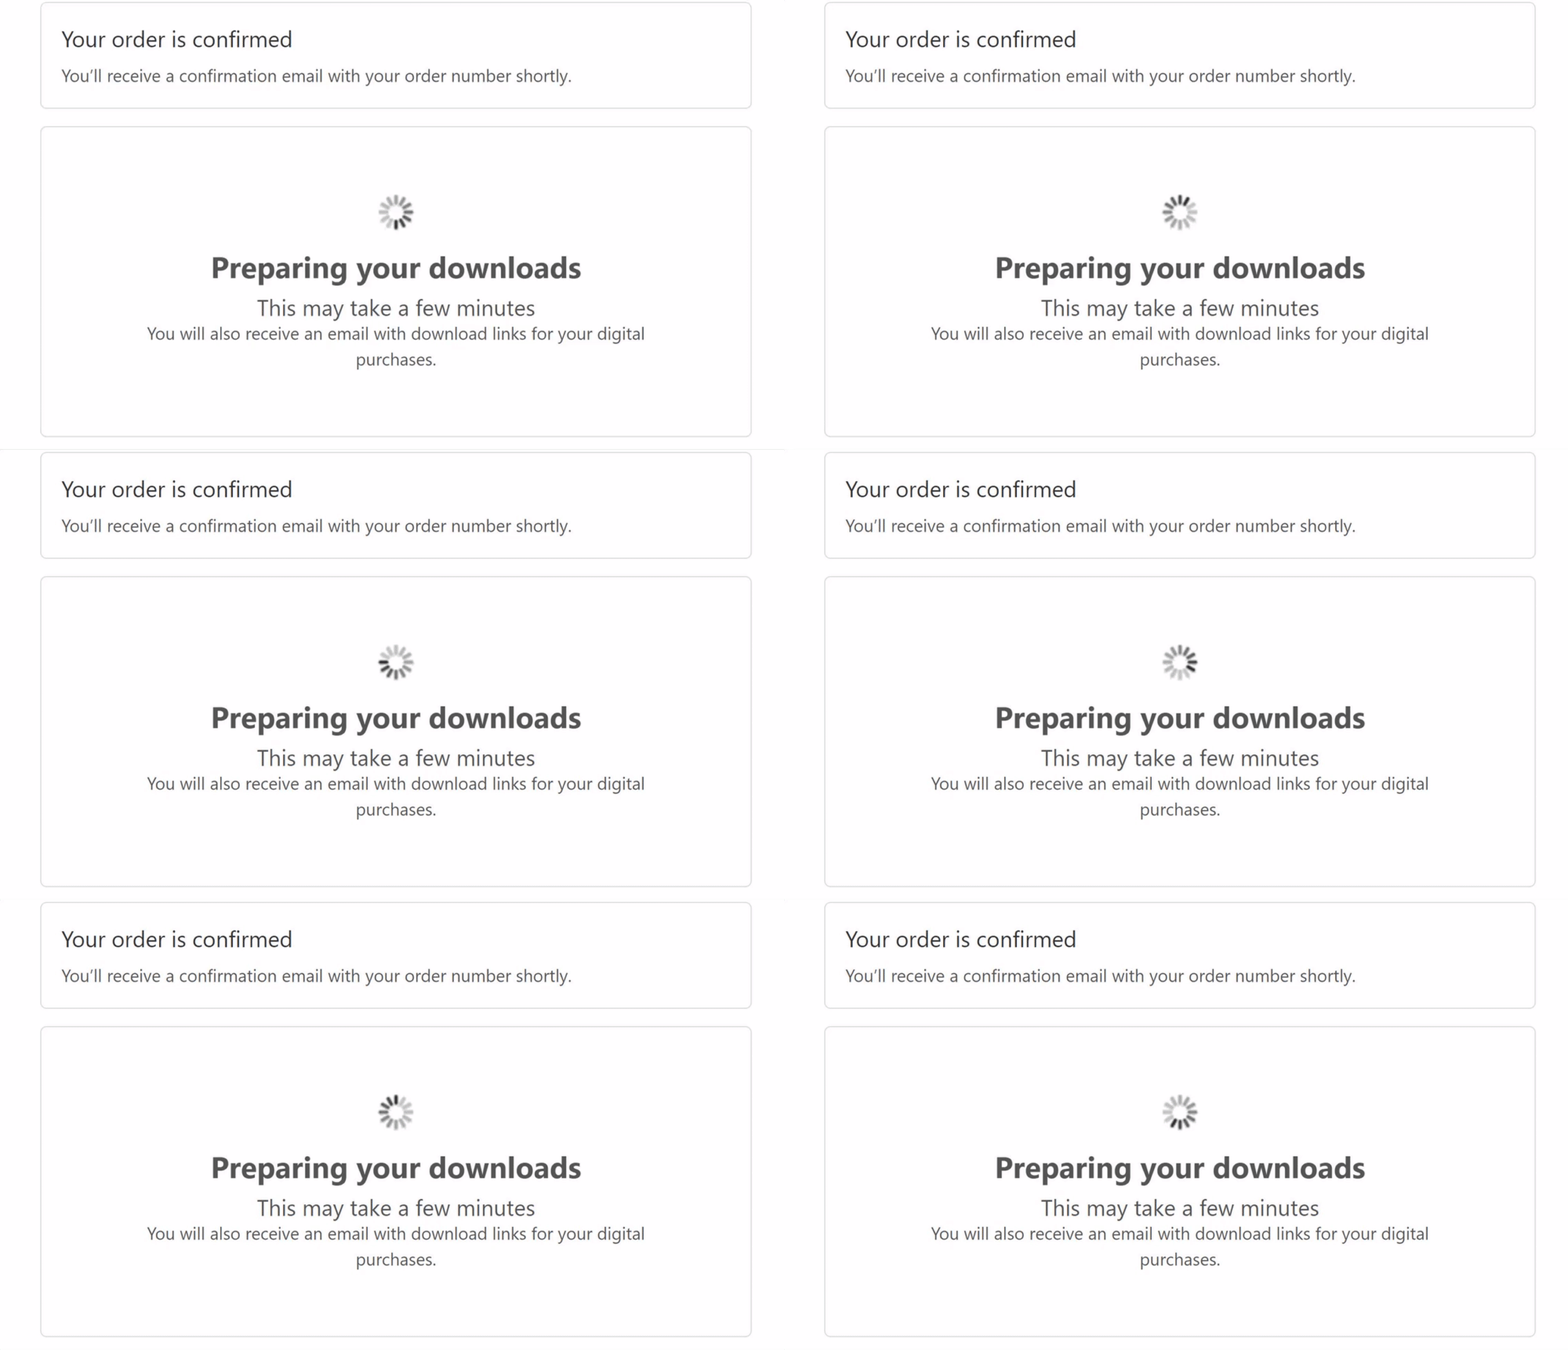
First, you'll need to purchase and download your Minecraft Server Icon pack! Go to https://readyartshop.com/collections/buycraft-icons , pick one out, checkout and you'll see a screen like this:
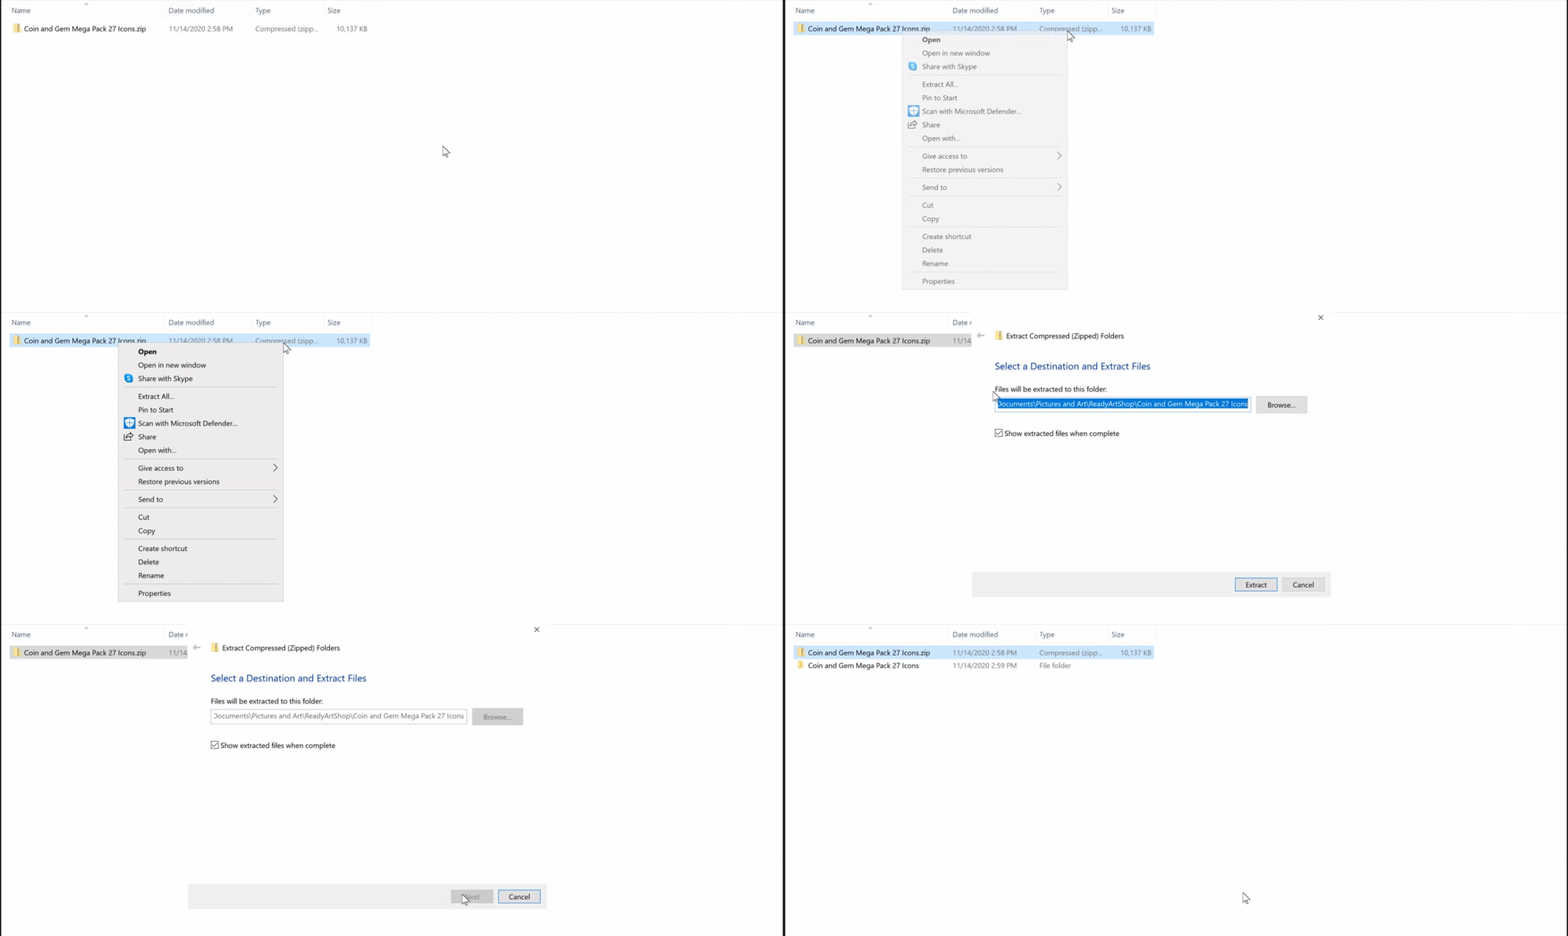
Once it loads, your minecraft server icon downloads will pop up- download them, and unzip the file so you can see the .png images.
After you've done that, make sure you have Krita downloaded, or whatever program you intend to use!
Step 2:
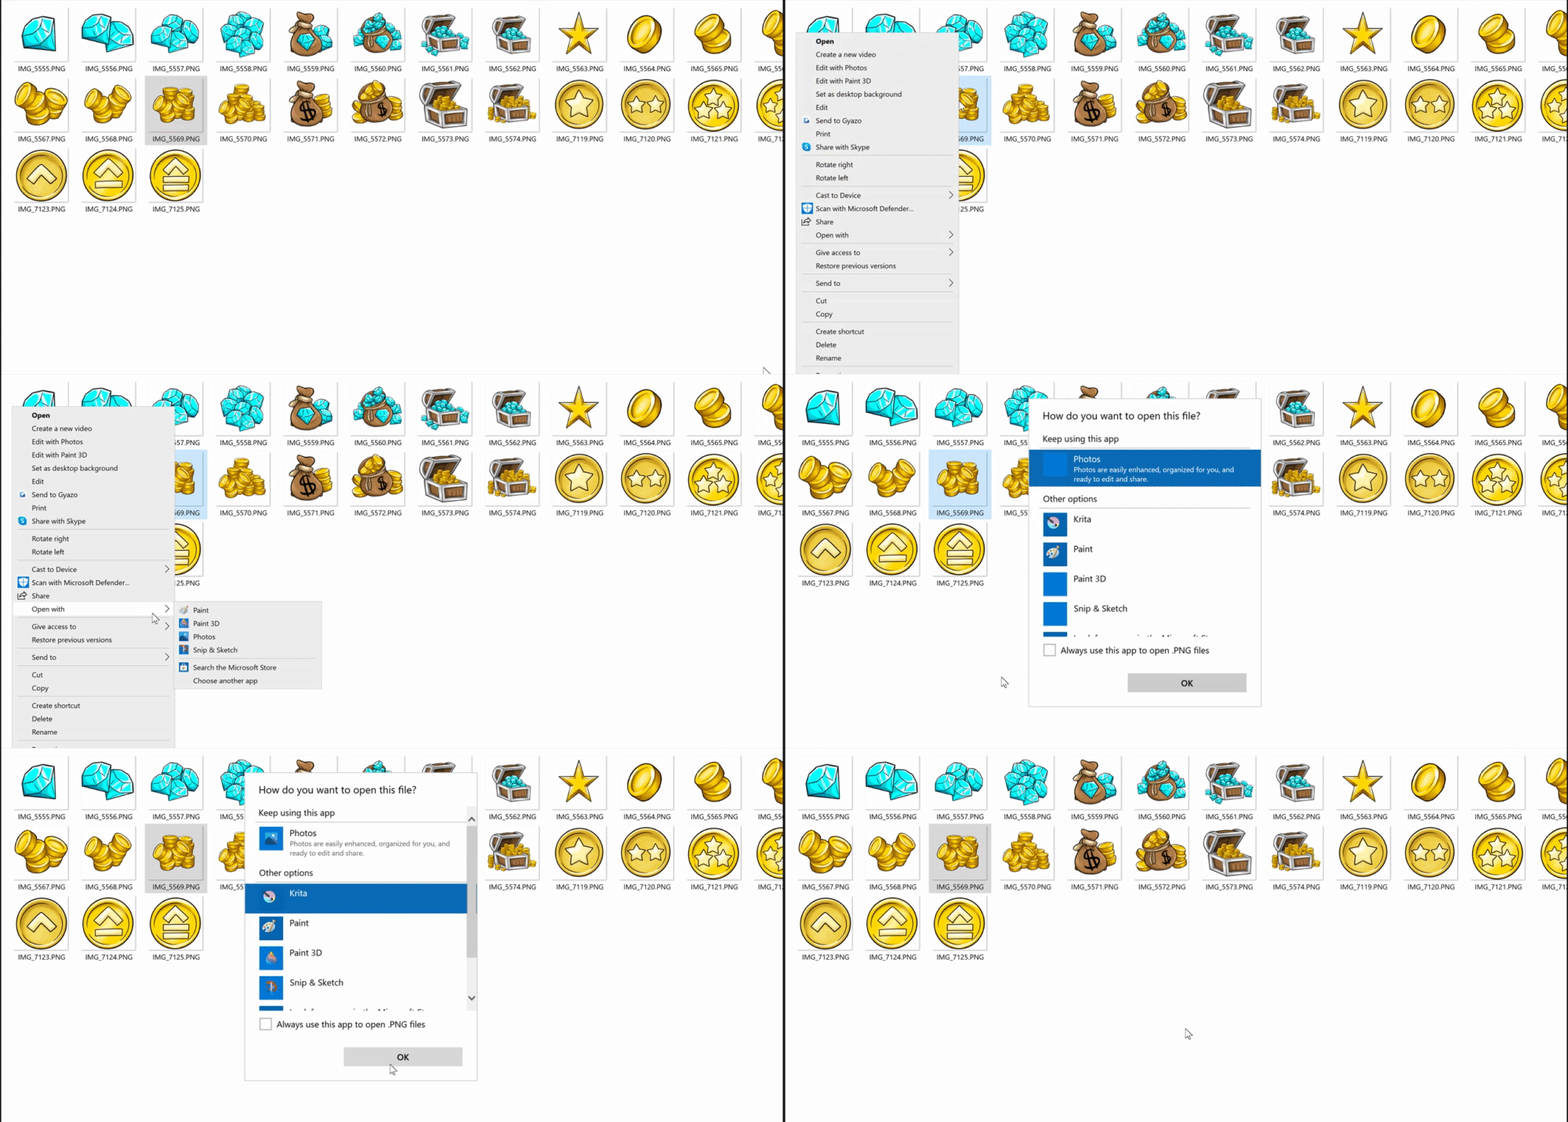
Next, you'll need to open the PNG file you wish to edit with the program you downloaded. On Windows, right click -> Open With -> Your Program. If you don't see it, as in my example, you'll have to click "More options" and then select the program.
Step 3 (Adding Text):
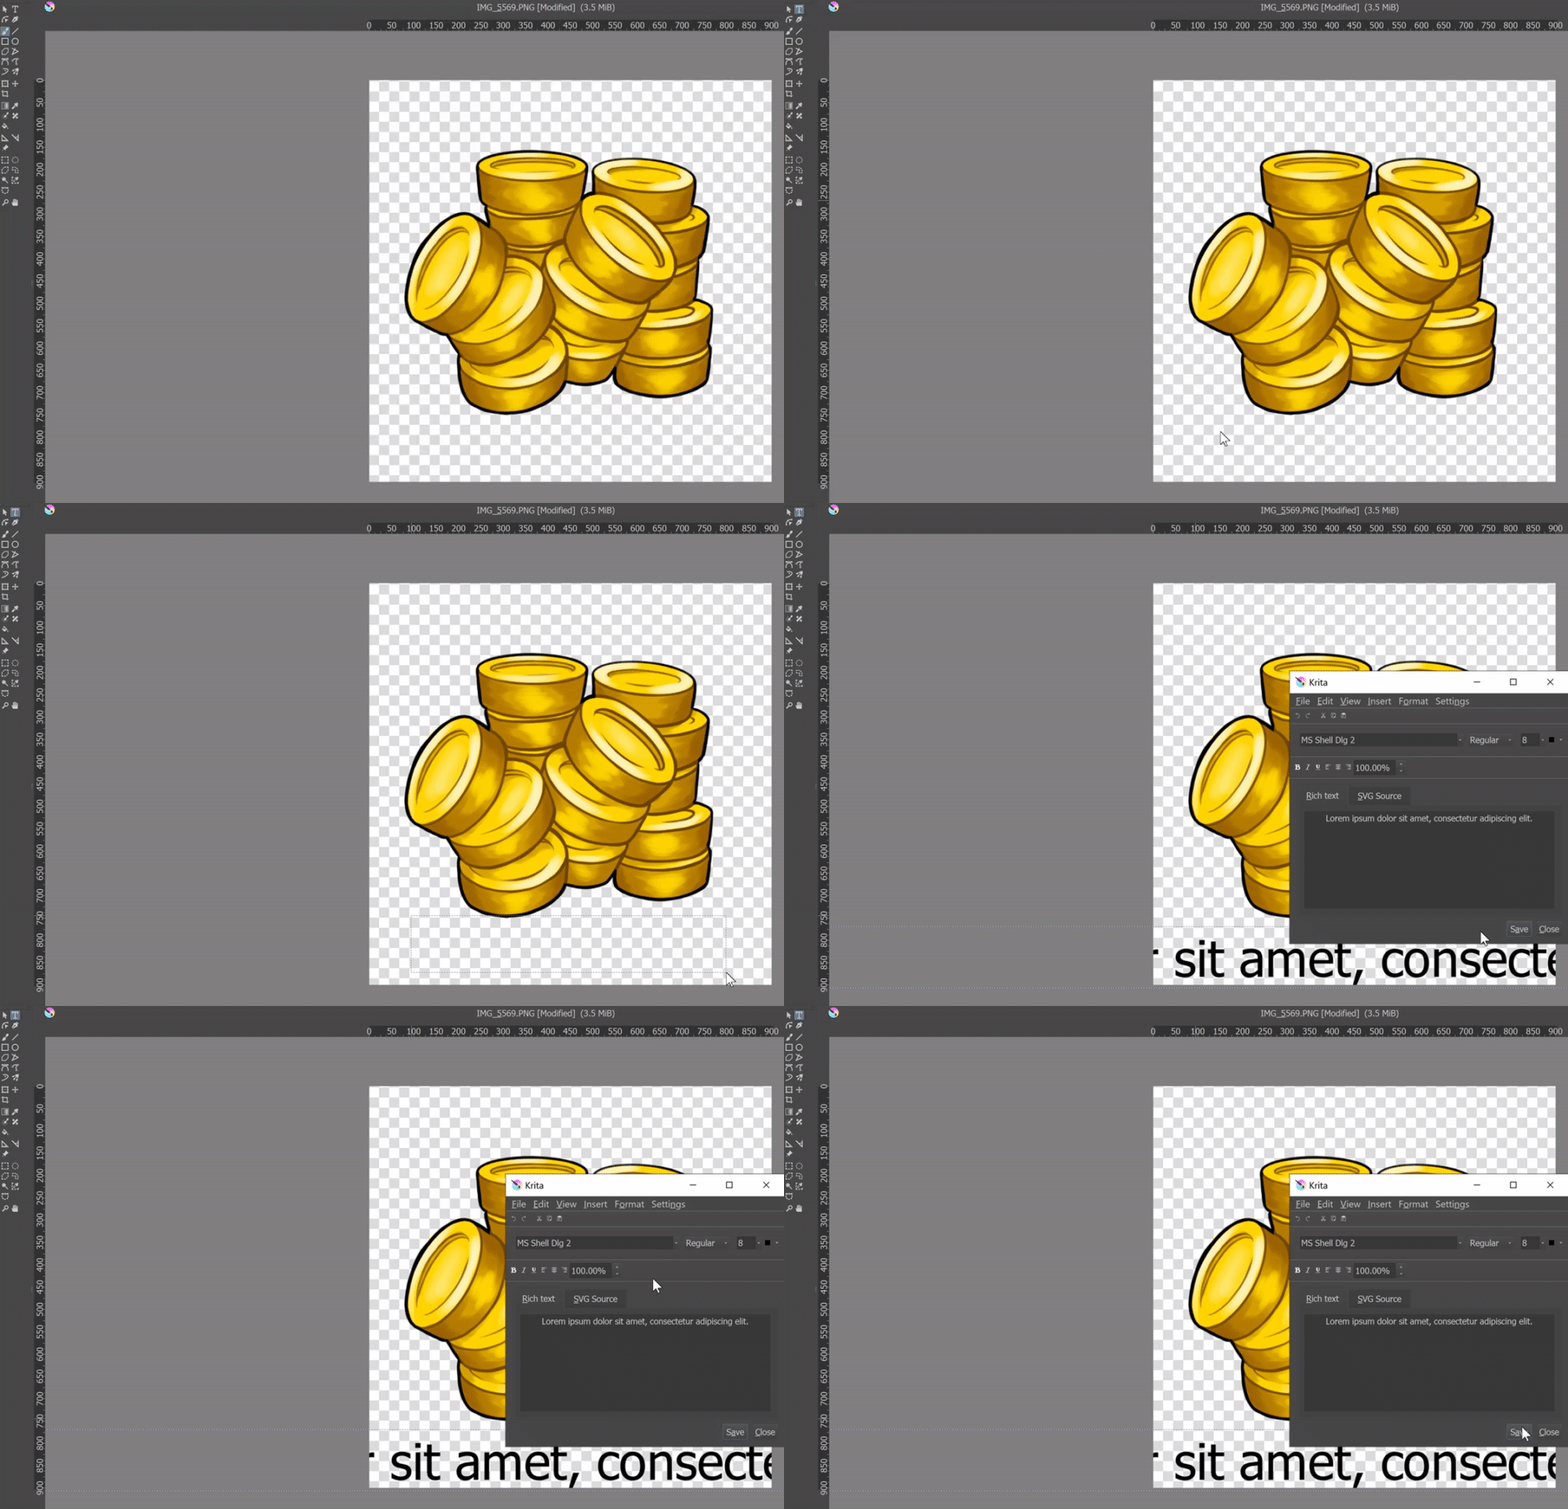
So you want to add text to this icon! In Krita, they make it super easy. Once your image is uploaded in Krita, you'll see a checkerboard background with your minecraft server icon on top. This is okay! It means the icon has a transparent background.
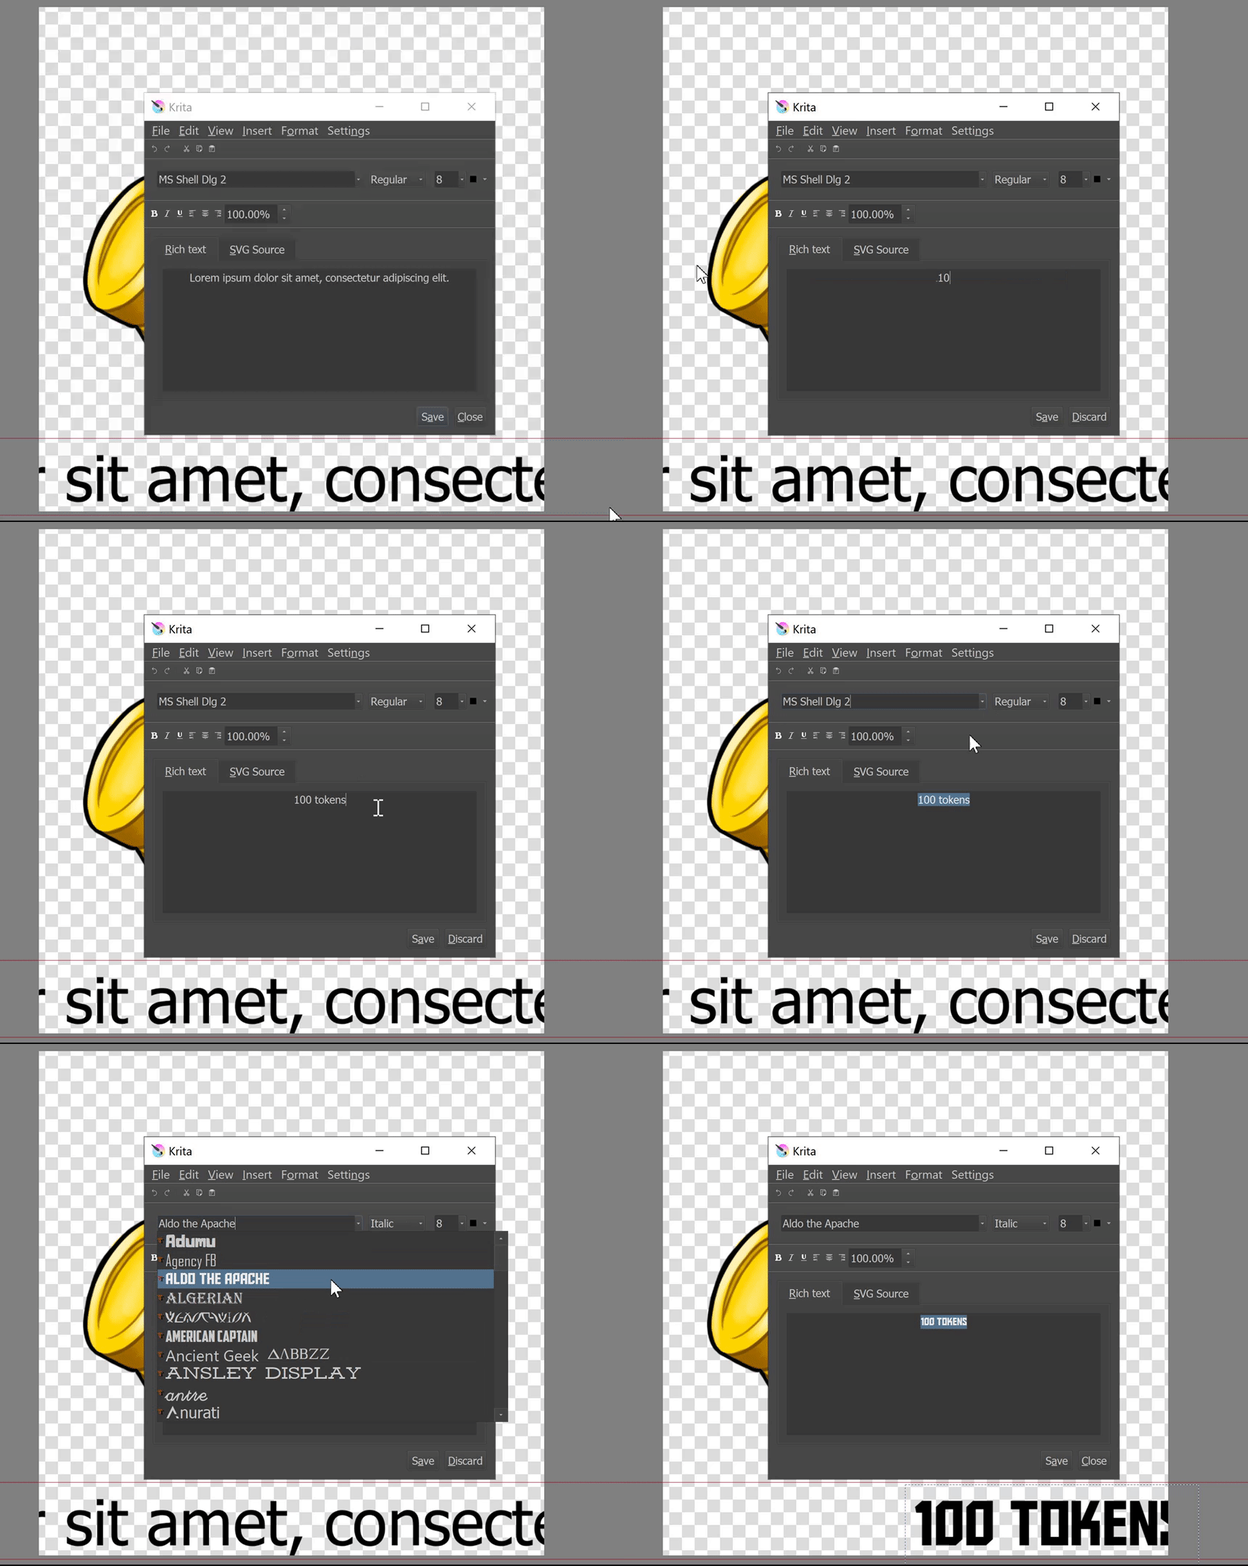
To add text, all you have to do is click the little T icon on the left side, and then click and drag a box where you would like the text to appear on your server logo png. Like this:
You'll see a popup showing the text properties. It will have placeholder text, delete that and write whatever you want on your Minecraft Server icon - as shown. Adjust the size if you want it bigger or smaller, and the font, if you would like. To change the font, highlight your text in the Rich Text box, click the little arrow on the right side of "MS Shell Dig 2" in my example, and you will see a list of your fonts. Pick one, and it will automatically change.
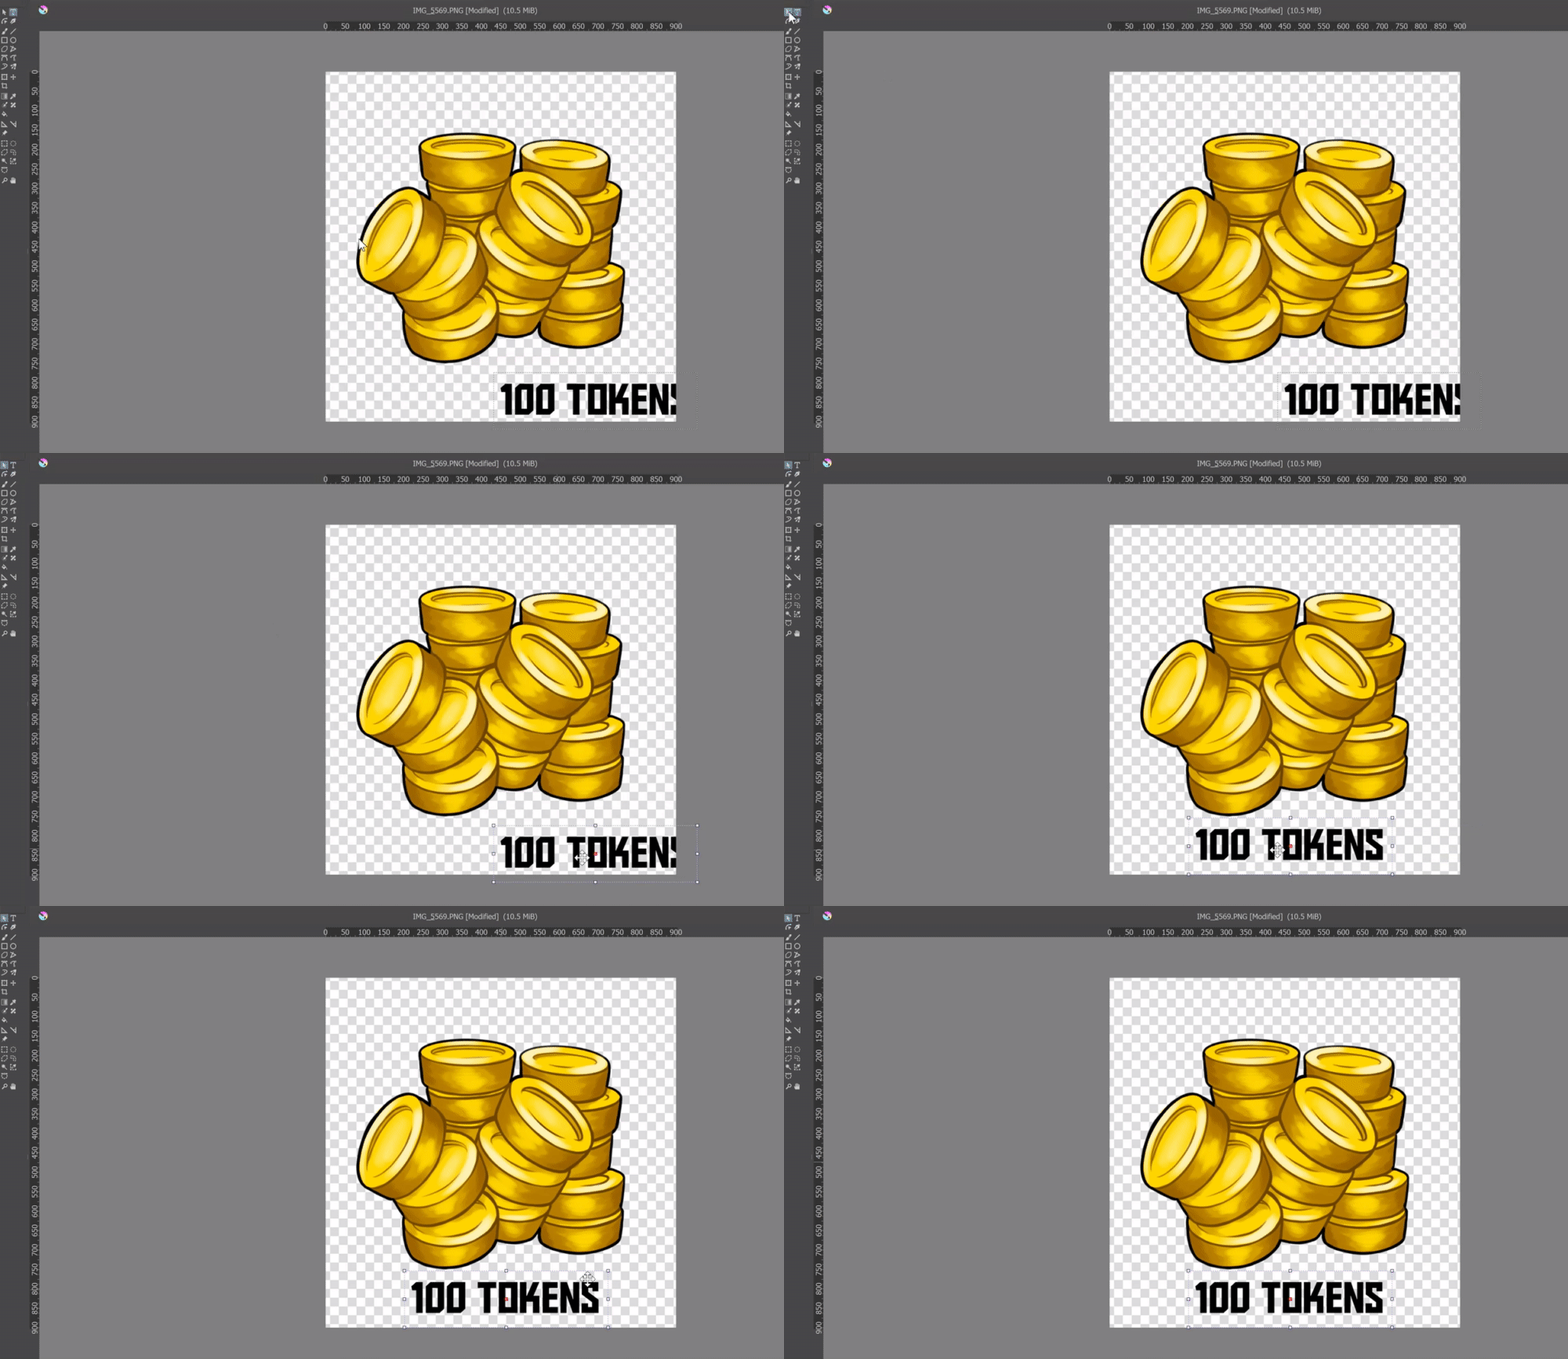
Once you've picked that, you'll see your text pop up in your picture! This is what you want. On the left side, click the cursor icon button in your Krita menu, and click and drag the text into position.
Step 4:
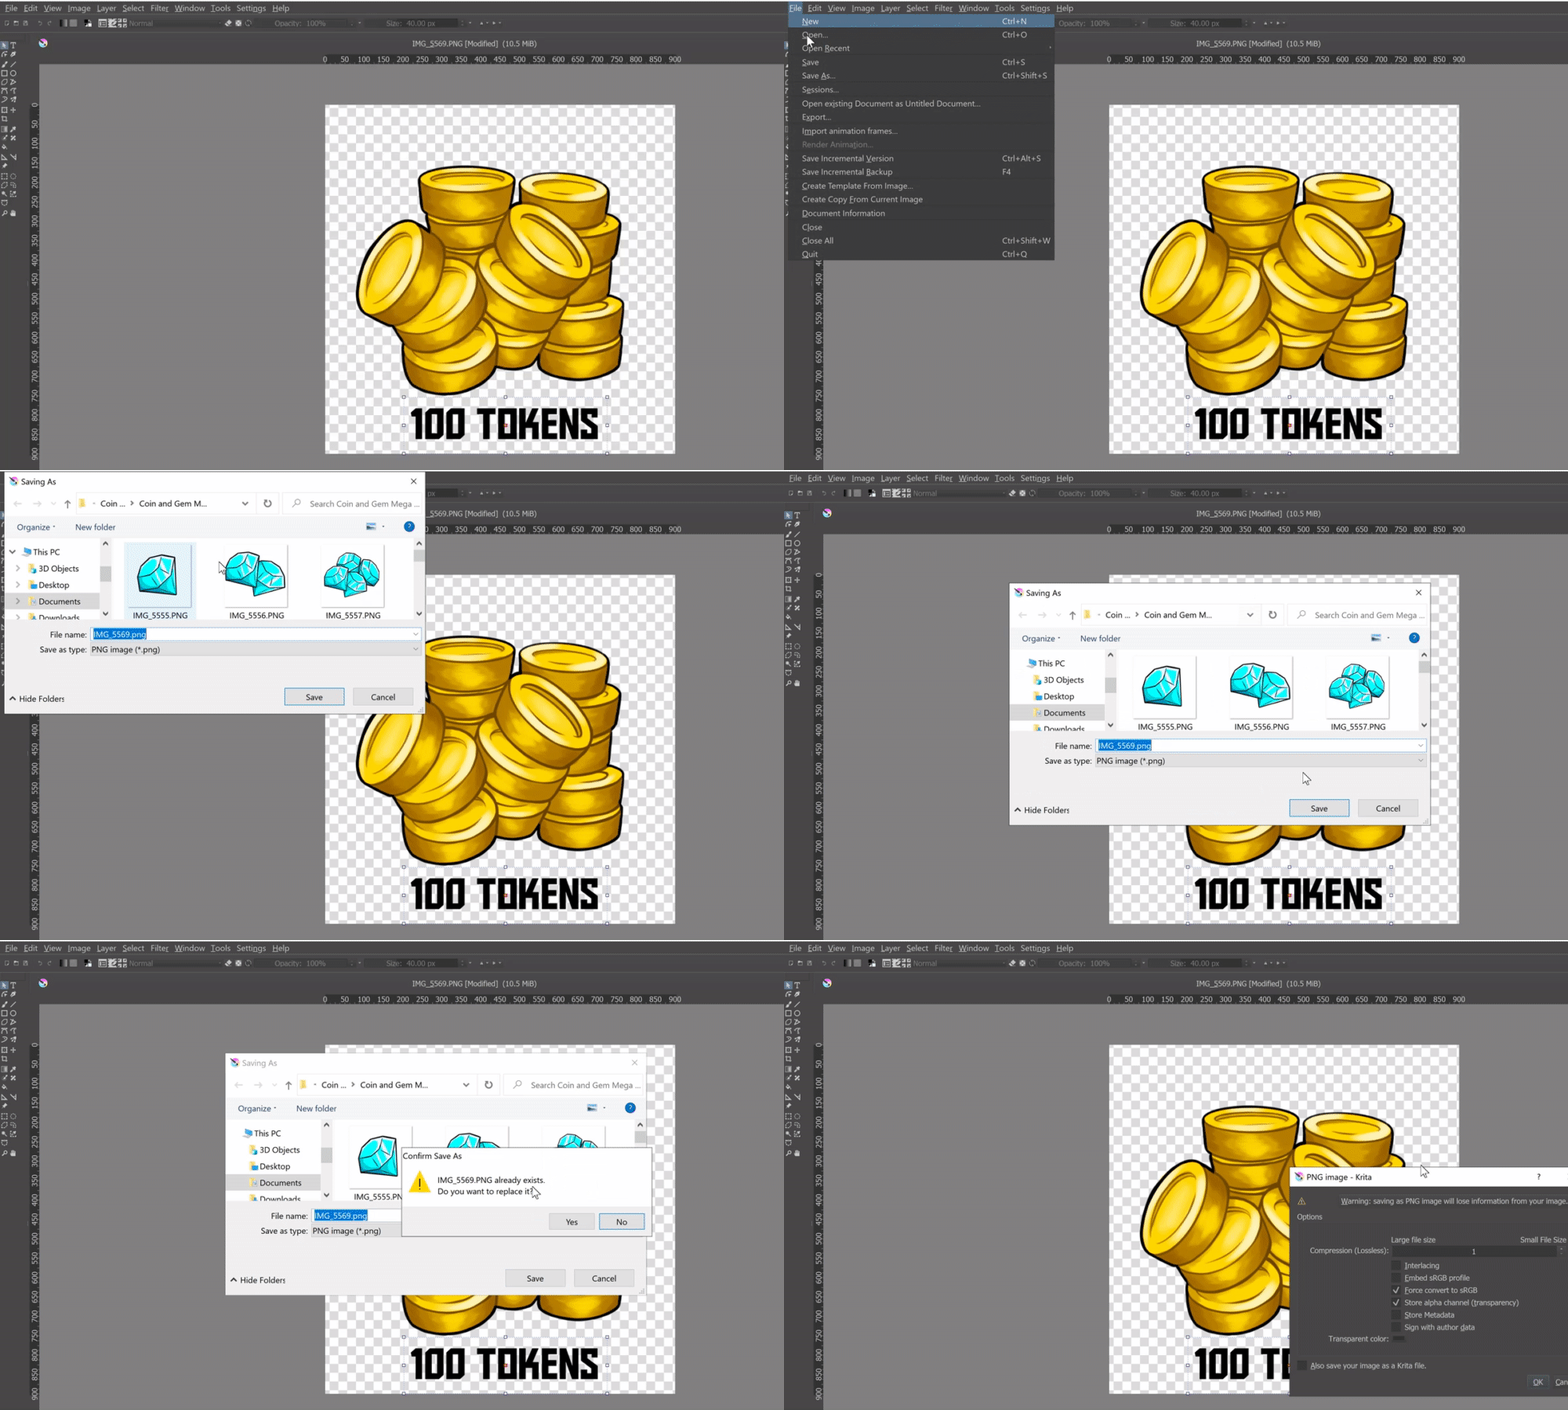
Congratulations, you're practically done! Now, get your Minecraft server icon out of your editing program. All you have to do is go into the top left, click File, and click Save As. Your file explorer will pop up - pick where you'd like the icon to save, and ensure it is set to save as a PNG image. Then, click save!
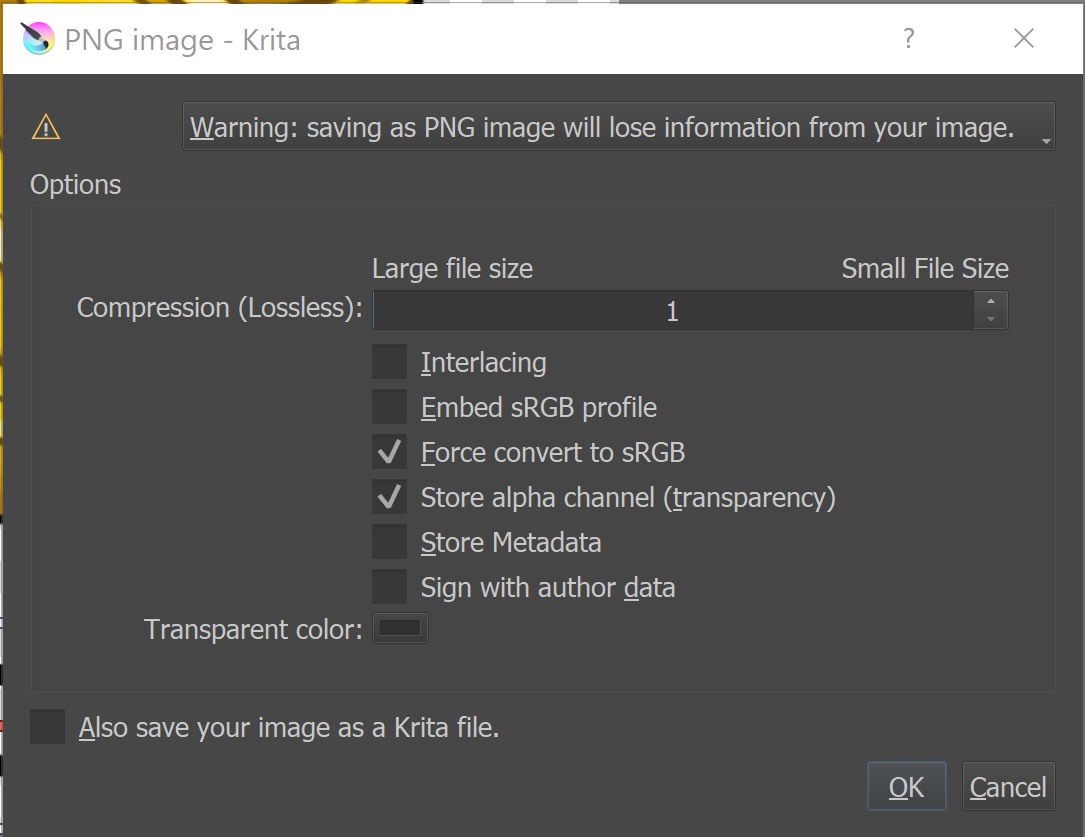
You may get a popup after clicking save in your file explorer. Make sure the file size is set to 1, which is the largest. Otherwise, make sure it looks the same as mine, and click "OK"!
Congratulations! You've got your minecraft server icon image set and ready to go with your custom text added.


